Wednesday 29 December 2021

Vegan Gingerbread Cupcakes with Cream Cheese Icing

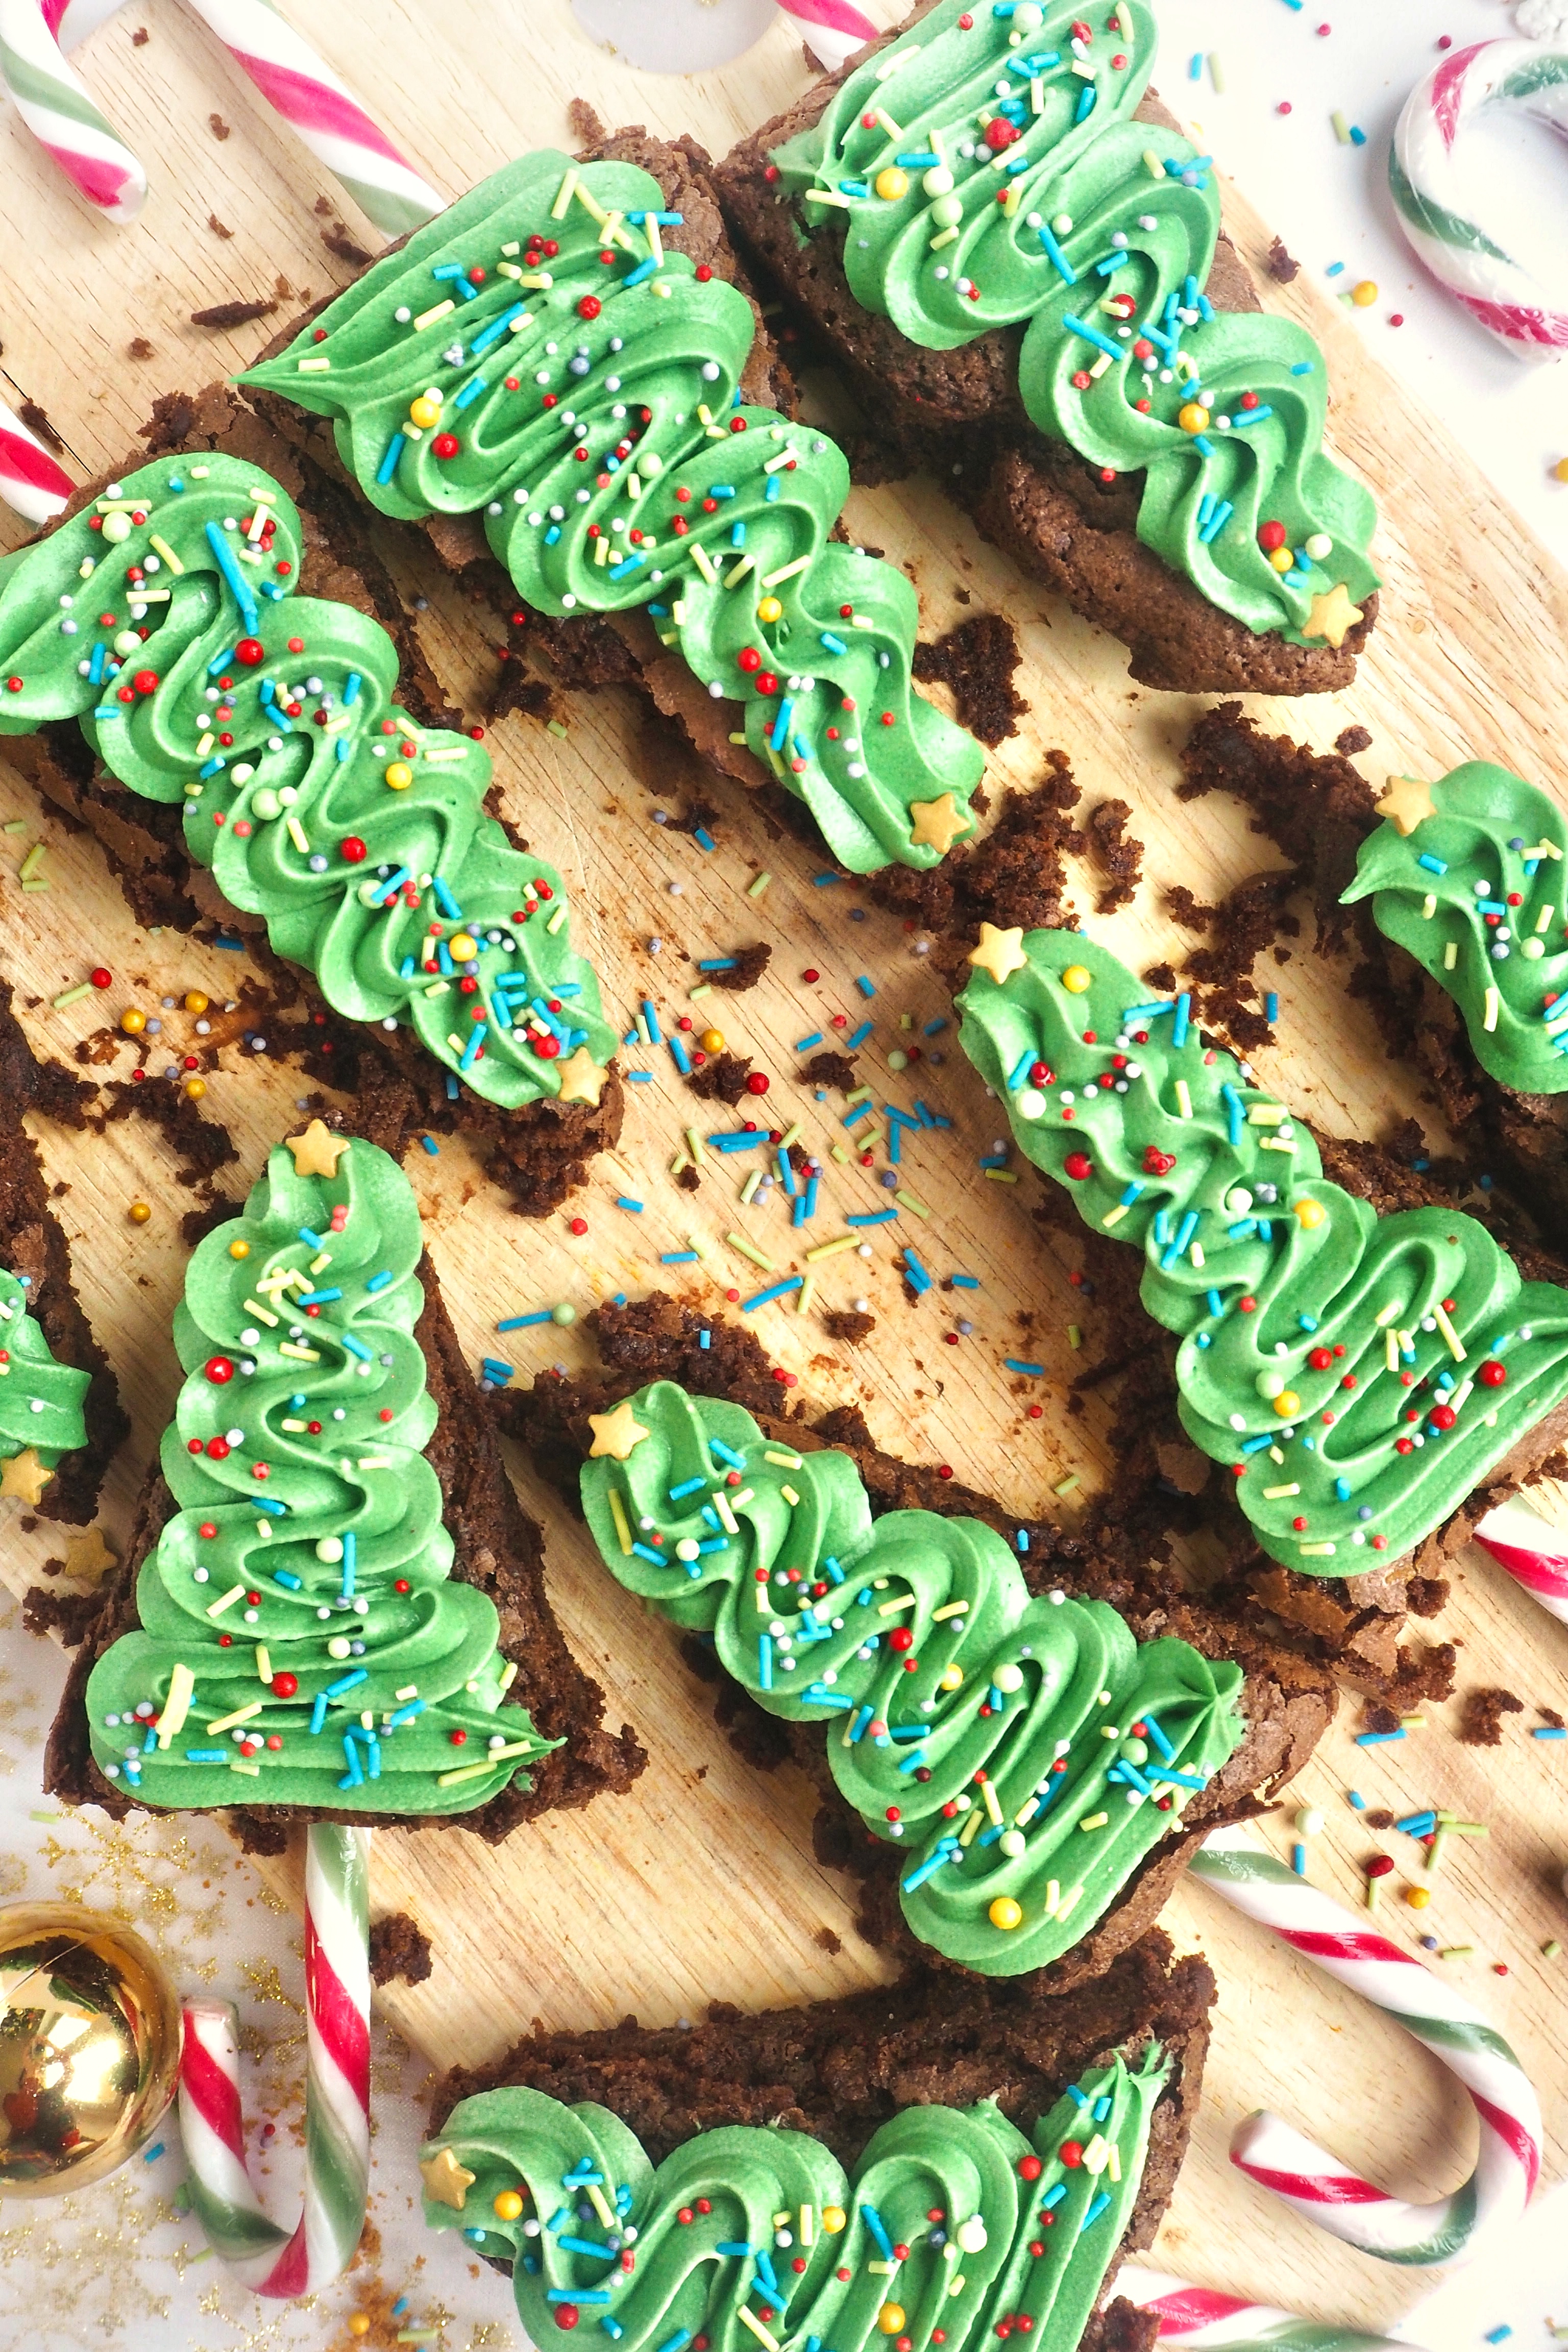
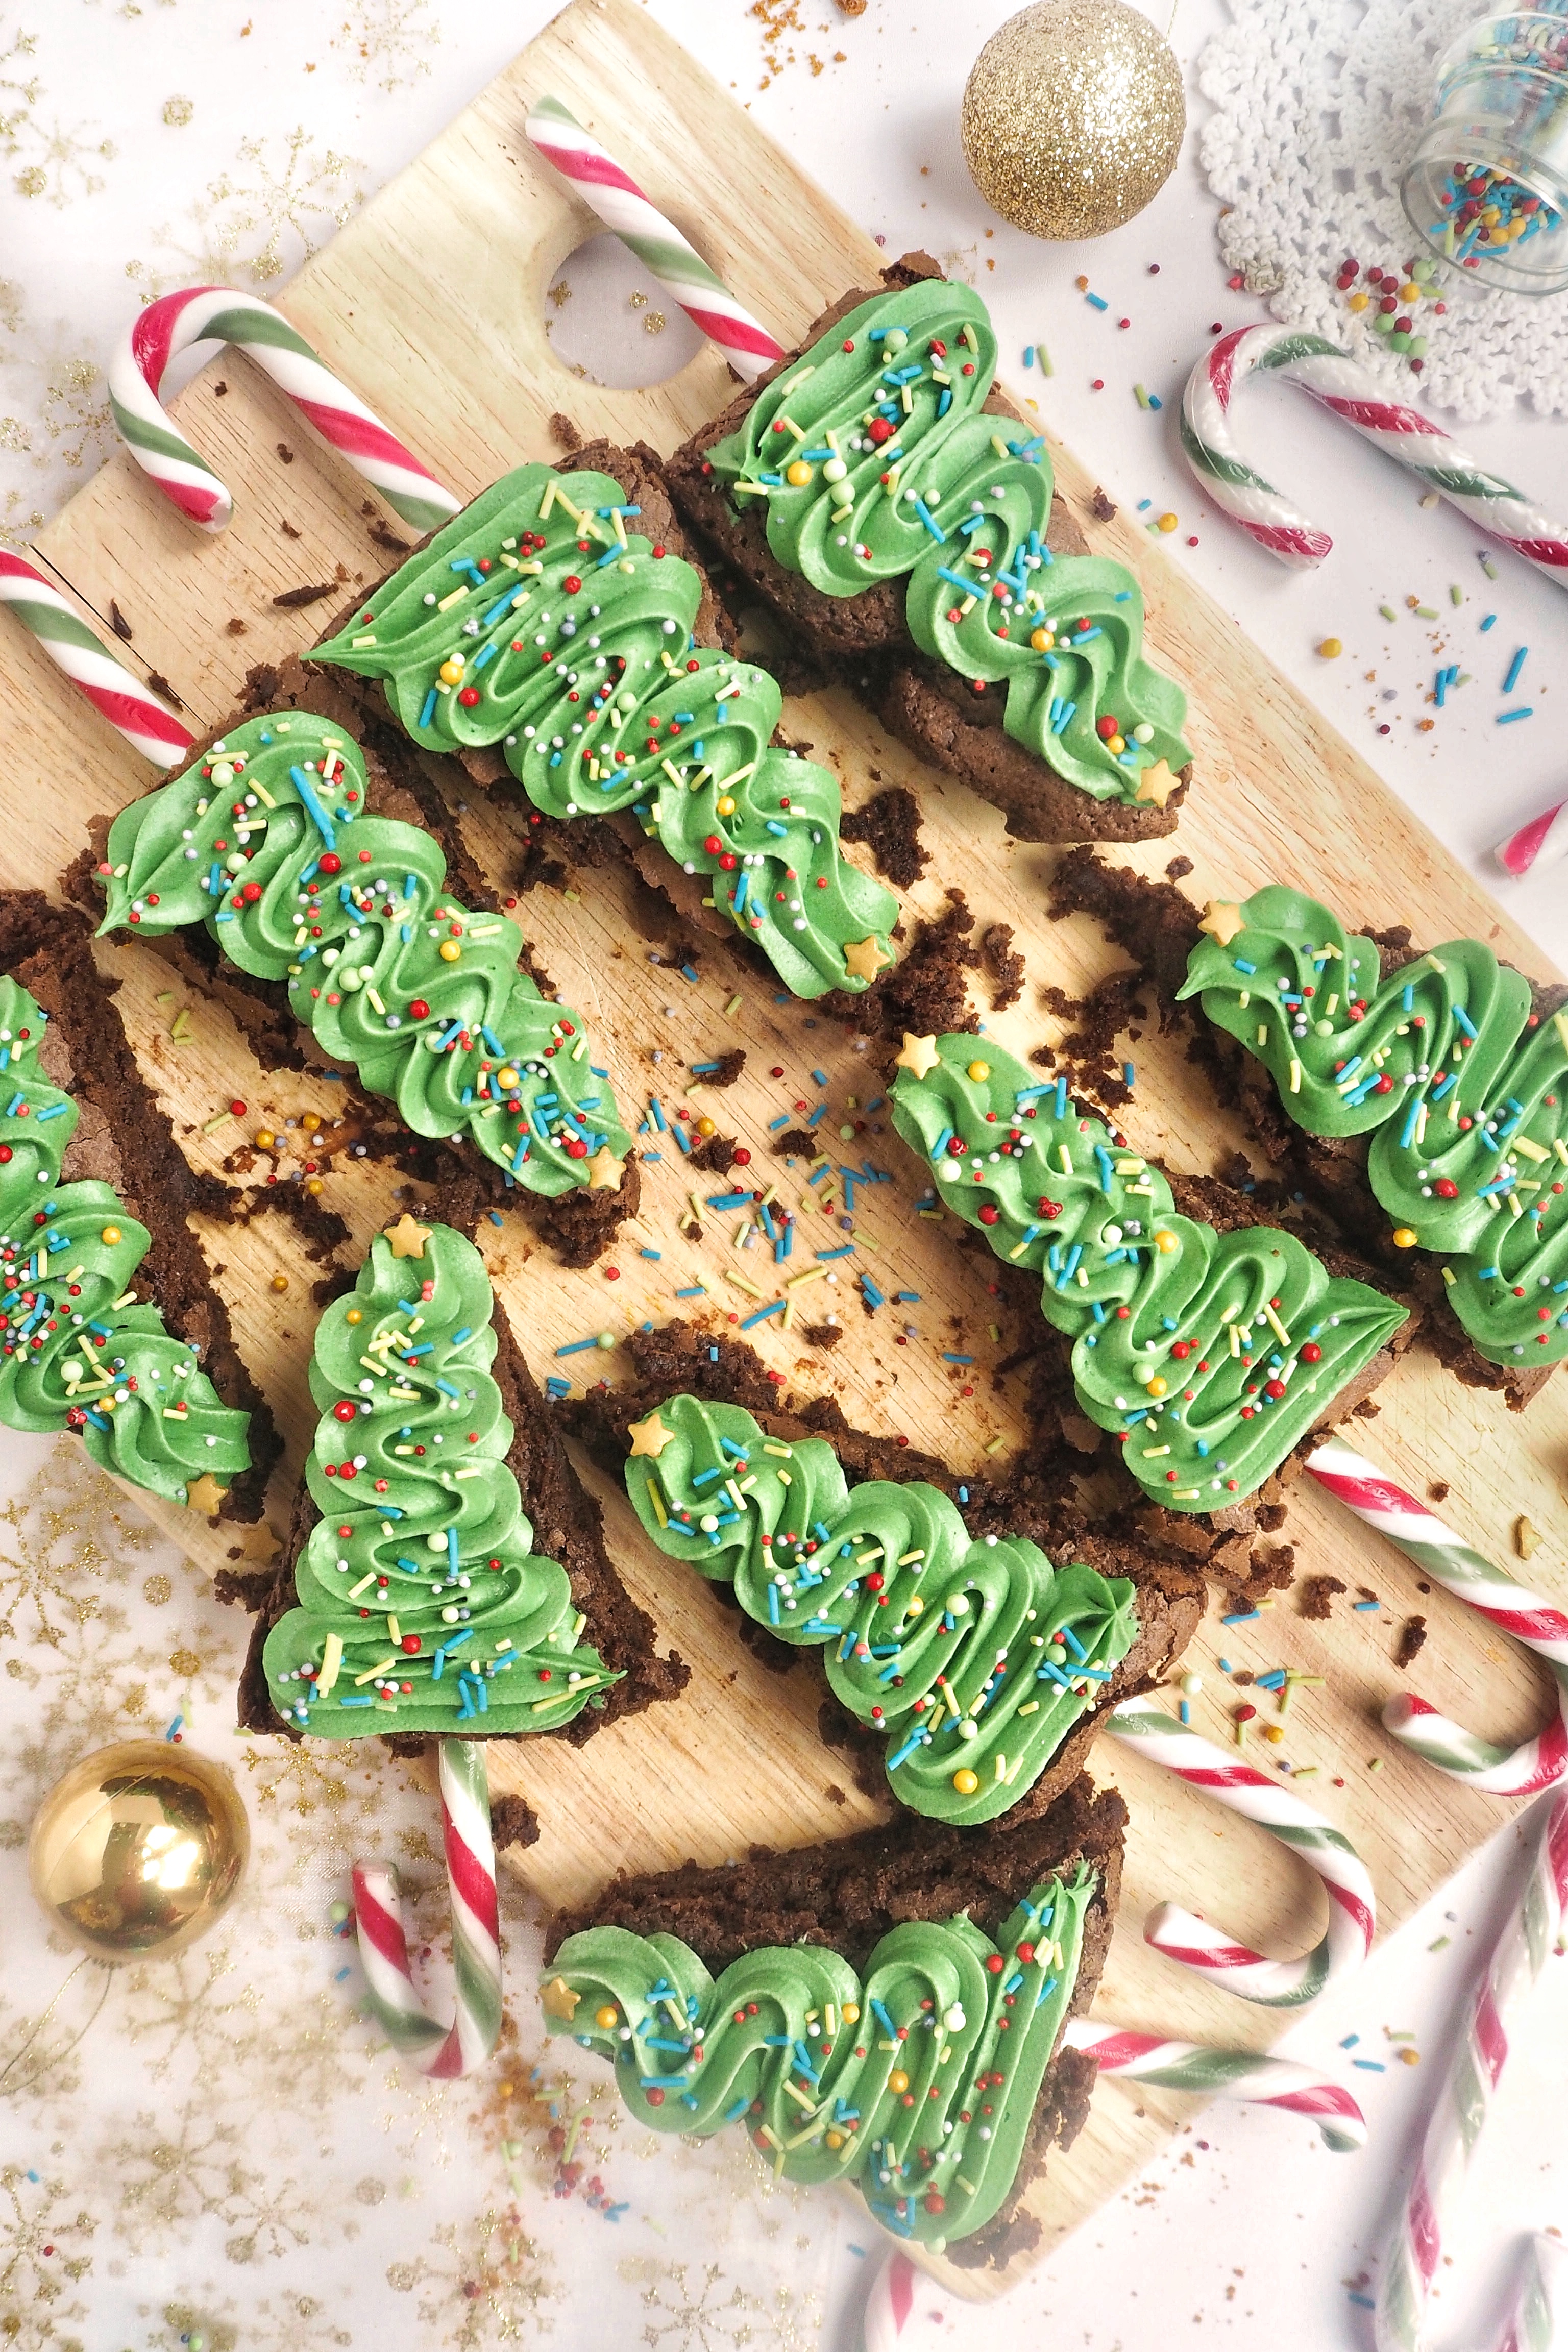
Spiced gingerbread cupcakes with a sweet and tangy cream cheese icing, perfect for a treat over the Christmas holidays!


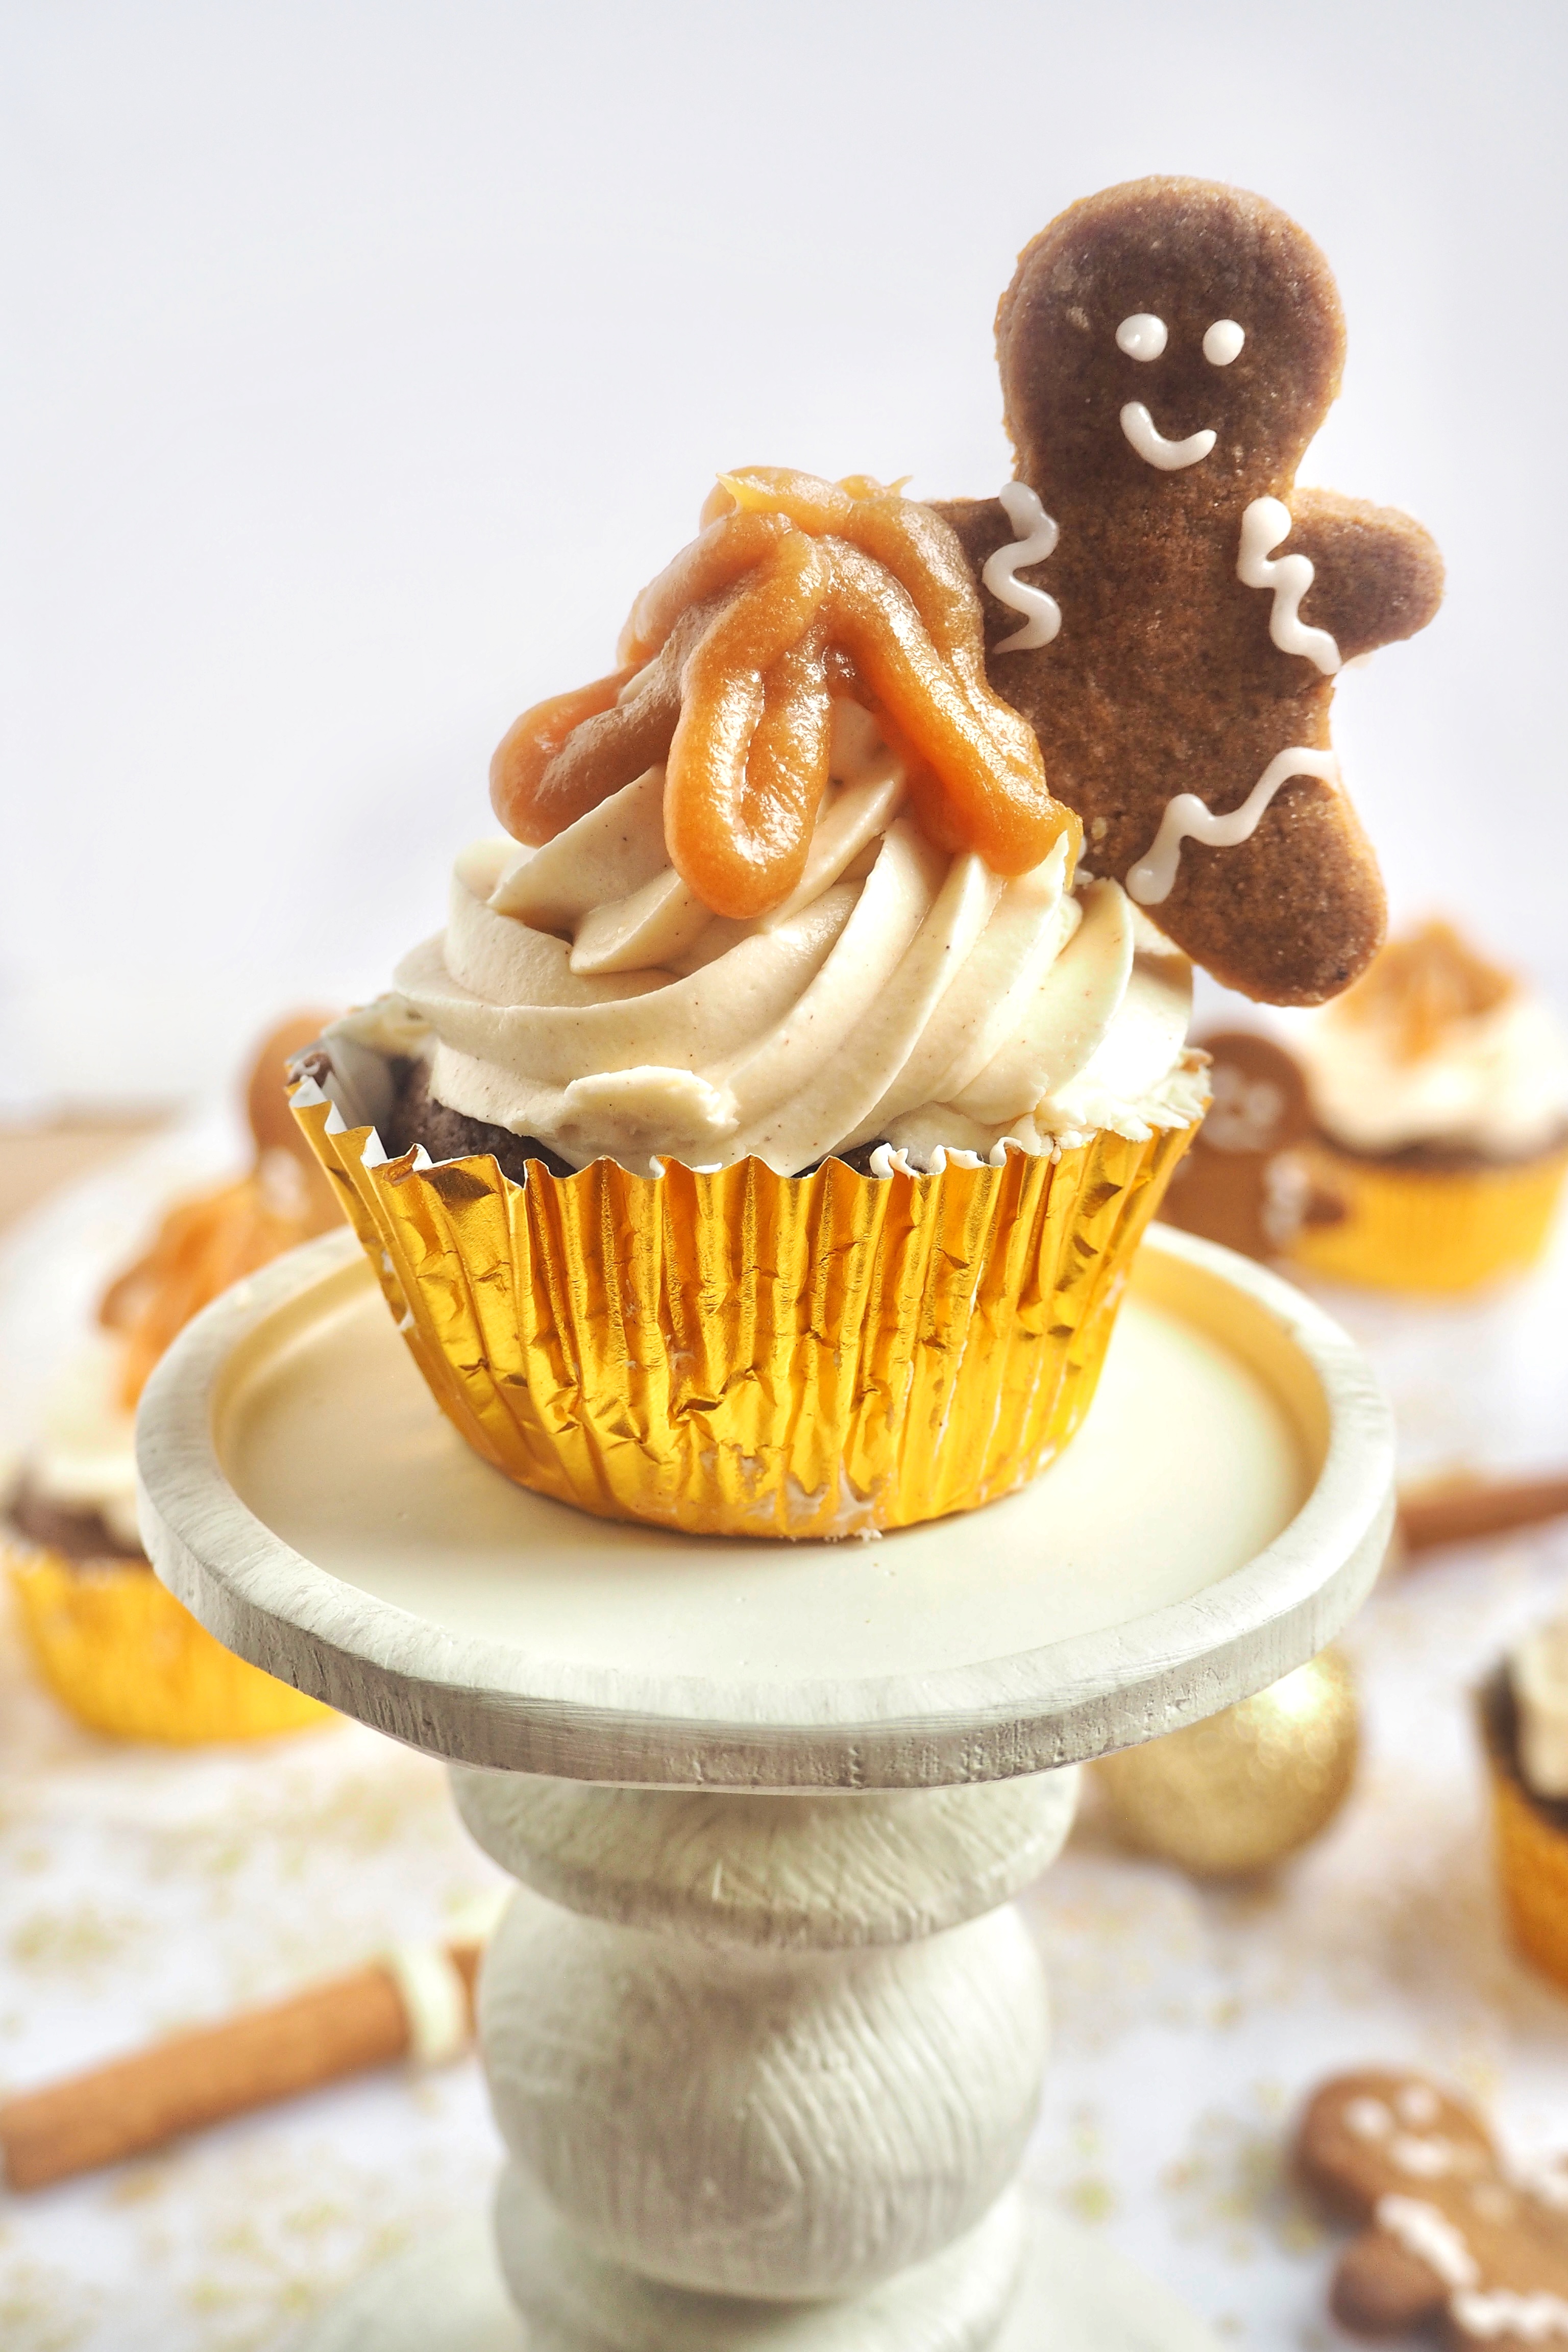
I have had these cupcakes on my list for years and I wanted to get them just right. I may have gone overboard with the gingerbread flavours this year, but I have zero regrets, as for me gingerbread is essential at Christmas time. These cupcakes are  packed full of ginger and cinnamon, they're fluffy and moist and the cream cheese icing marries those spices perfectly. I drizzled a velvety caramel sauce on top for a little sweetness and some texture, then topped each cupcake with a mini gingerbread man. All in all, these cupcakes are the epitome of Christmas, perfect for sharing around the dessert table and also a really fun activity to do over the holidays if you're looking for some baking. 

If you love Gingerbread and Christmas baking....

Check out these recipes for more inspiration!

Recipe

Prep: 15 minutes + 1hour for the icing
Cook: 18 minutes
Serves: 12 cupcakes

Notes:

  • I find Oatly to be the best brand for vegan cream cheese as I have found that other vegan cream cheeses are more watery and do not create a thick consistency for an icing. 
  • I really recommend storing the cream cheese icing in the fridge for 1 hour before piping onto the cupcakes as it will firm up and help create a nice swirl. If you are short on time you can simply spread the icing with a palette knife instead of piping. 

Ingredients

  • Cupcakes
  • 200g Plain flour
  • 180g Soya milk + 1 tbsp Apple cider vinegar 
  • 120g Dark brown sugar
  • 60g Treacle 
  • 70g Butter. melted
  • 1 tbsp Ginger
  • 1 tsp Cinnamon
  • Pinch of salt
  • ¼ tsp Ground cloves
  • ¼ tsp Allspice
  • 1 tsp Baking powder
  • ½ tsp Bicarbonate of soda
  • Icing
  • 150g Butter, room temp
  • 70g Cream cheese 
  • 350g Icing sugar
  • Optional
  • Caramel 
  • 12 mini gingerbread men

Method

  1. Preheat the oven to 170℃ and grease and line a cupcake tray with cases.
  2. In a jug mix together the soya milk and apple cider vinegar to create a 'buttermilk', leave for 5 minutes.
  3. Melt the butter and mix in a large bowl with the sugar and treacle until combined. 
  4. In a separate bowl combine the flour with the dry ingredients then mix in the wet ingredients into a batter.
  5. Spoon about 2 ½ tbsp of the batter into 12 cupcake cases and then bake in the oven for 15-17 minutes until a knife inserted comes out clean. Leave to cool on a wire rack. 
  6. Meanwhile make the cream cheese icing. Beat the butter until smooth then mix in the cream cheese until just combined - don't overman as it will start to become more fluid. 
  7. Add the icing sugar gradually and then place in the fridge for 1 hour to firm up. I find it best to do this so that the icing is firmer for piping but you can skip this if short on time. 
  8. When the cupcakes are cool enough and the icing is firm, spoon the icing into a piping bag with a star tip and pipe a swirl on top of each cupcake. 
  9. Drizzle some caramel on top if using, and then top each cupcake with a gingerbread man. Store in the fridge to keep the icing firm or serve straight away. Enjoy!

Christina
xx


Share:

Wednesday 22 December 2021

Christmas Tree Brownies

Turn a simple traybake into beautiful Christmas tree - definitely one to enjoy making with children!


I saw the Christmas tree brownie idea on Pinterest and knew I had to make a vegan version of my own, plus it looked so much fun and so simple! And when I say how simple this is, I really mean it. I've used a brownie packet mix here to show you how easy it is with very few ingredients. Then once I made these, I left the brownies to cool completely. Do not skip this step as you need the brownies to be firm for cutting them into triangles. I did also see someone cut the brownies into tree shapes with a cutter which I also thought looked so cute and effective. I just cut them with a knife as it was sharper. I then made some green buttercream, piped some swirls onto the brownies and sprinkled them to finish! You don't need to be a pro baker to make these. And I can imagine if you have children, nieces/nephews, friends or work in a school etc, this would be so much fun to do with them, children will love it. They are the perfect traybake for a Christmas Day dessert!

If you love brownies....

Check out these recipes for more inspiration!

Recipe

Prep: 10 minutes
Cook: 25 minutes for brownies
Serves: 8-10 Christmas trees

Notes:

  • Any brown mix will work with this recipe as long as the batch makes at least 8 brownies or the size of an 8x8 inch baking tray. Betty Crocker does a good one. 
  • I find the best sprinkles to be from the Baking Time Club - they have a lot of choice especially for Christmas sprinkles.
  • For the buttercream, you can make it yourself using this recipe although you'll need green food colouring. Or you can use a ready-made one. 

Ingredients

  • x1 batch from a brownie mix
  • 400g Vanilla buttercream 
  • Green food colouring
  • Sprinkles
  • Peppermint candy canes

Method

  1. Follow the instructions for the brownie recipe then leave to cool in the tin. 
  2. Once cool, place in the fridge for about 1-2 hours so they firm up, this makes it easier to cut neat shapes out of the brownies so they don't fall apart.
  3. When firm enough, slice the brownies in half. Then cut 4-5 triangles down one side then repeat on the other half of the brownies. If you're using a cookie cutter you may not get as many brownies as I did with the triangles.
  4. Prepare your buttercream and mix with the green food colouring. Spoon into a piping bag with a star piping tip and pipe a pattern on top however you like.
  5. Then add lots of sprinkles on top to decorate. Eat straight away or you can place in the fridge to keep the buttercream firm but they can also be stored at room temperature in an airtight container up t 3 days. Enjoy!

Christina
xx
Share:

Tuesday 21 December 2021

Gingerbread Men Biscuits

These gingerbread men are super easy to make and are vegan!

It was never a tradition for myself or my family to make gingerbread men every Christmas, but as I've gotten older I've found myself wanting to make them every year. Not only do I love the taste, the snap of the biscuit, perfectly dunked in tea (essential to dunk all biscuits no?) the spicy ginger, I do love decorating them as tedious as it may be. Do they all look the same? Absolutely not. Could I improve my icing skills? 100% yes. But that's all the fun of it. This tradition I do solely by myself, I'm not surrounded by creative bakers but that doesn't stop me having a little fun. Nevertheless, gingerbread men are so much fun done with others, especially if you have children, nieces, nephews, friends etc. It's the perfect activity for some festive fun! Plus, gingerbread men are perfect for topping some gingerbread cupcakes or a gingerbread cheesecake

If you love gingerbread...

Check out my other recipes for more inspiration!

Recipe

Prep: 5 minutes
Cook: 10 minutes
Serves: 28 biscuits with a 5cm cookie cutter - may make more or less depending on the size of the cutter

Notes:

  • There are lots of decorating ideas using royal icing on Pinterest that are really easy to copy. I went for something simple but try different techniques if you're up for a challenge. 

Ingredients

  • 100g plain flour
  • 80g caster sugar
  • 10g ground ginger
  • 1 tsp bicarbonate of soda
  • 60g golden syrup
  • 40g butter
  • Royal icing for decorating 

Method

  1. Preheat the oven to 160℃ and grease and line a large baking tray. 
  2. Melt the butter and golden syrup together in the microwave. 
  3. In a large mixing bowl, add the dry ingredients and mix. Then add the butter/syrup mixture and mix well, till a dough is formed. 
  4. Dust the work surface with some flour and roll the dough out to 3mm thick. Use a 5cm cookie cutter to cut out biscuits and place onto the lined baking tray.
  5. Bake for 10 minutes but no longer as they can burn really easily. Leave to cool on a wire rack before decorating with royal icing. Enjoy!

Christina 
xx
Share:

Friday 17 December 2021

Vegan Mince Pie Brownies

If you love mince pies and brownies, combine them together for a very festive traybake!

I had seen some inspiration for a mince pie brownie last year and I quite honestly thought it was the best combination for a Christmas treat. And I'm pleased that this vegan brownie recipe turned out as well as it did, if you've been following for a while, you'll know I struggle with vegan brownies sometimes! But this one is just magical, it was a Christmas dream come true and these brownies are perfectly fudgy, slightly spicy and a little chewy from the dried fruit that works so well against the chocolate. i also really recommend sticking to using both brown sugars, they both add some deeper tones to the brownies, and especially the dark brown sugar is full of molasses which helps keeps these brownies nice and moist. These mince brownies, are the perfect traybake in the lead up to Christmas and are really quick and simple to make. Enjoy with some mulled wine and a your favourite festive film (hello aliteration), you've got a cosy day lined up. 

If you love chocolate and mince pies....

Check out these recipes for more inspiration!

Recipe

Prep: 15 minutes
Cook: 25 minutes
Serves: 16

Notes:

  • Only bake these brownies to the suggested time as overtaking them can cause them to be cakey and dry out. 

Ingredients

  • 200g Plain flour
  • 150g Light brown sugar
  • 100g Dark brown sugar
  • 80g Cocoa powder
  • 1 tsp Baking powder
  • ½ tsp Bicarbonate of soda
  • Pinch of salt
  • 1 tbsp Ground ginger
  • 1 tbsp Cinnamon
  • ¼ tsp Allspice
  • ¼ tsp Ground cloves
  • Zest of 1 orange + 90ml orange juice
  • 100g Applesauce
  • 100ml Soya milk 
  • 70g Butter, melted
  • 200g mixed dried fruit
  • Icing sugar, for dusting


Method

  1. Preheat the oven to 180℃ and grease and line an 8x8 inch cake tin with baking paper.
  2. In a large bowl, mix together all of the dry ingredients except for the dried fruit. Use a whisk to do this to help break up the sugar as it can clump easily.
  3. In a separate bowl, mix together the soya milk, butter, applesauce and orange juice. Add to the dry ingredients and combine.
  4. Fold in the dried fruit trying not to over mix the batter anymore.
  5. Spoon the brownie batter into the prepared cake tin and spread out evenly. 
  6. Bake for 20-25 minutes - try not to bake any longer than this, as it the brownies will lose their moisture and can dry out.
  7. Leave to cool in the cake tin before transferring to a wire rack. Dust with icing sugar and then serve. Best kept at room temperature for up to 5 days in an airtight container. Enjoy!

Christina
xx


Share:

Friday 10 December 2021

Vegan Orange Glazed Ginger Loaf Cake

 A gorgeous ginger spiced loaf cake with a zesty orange glaze!

I don't know about you but when I wrote 'ginger spiced' above I immediately thought of THE ginger spice. However no Union Jack dresses will be featuring in this post today I'm afraid! With this beautiful cake however, it is the exact cake I expect one to have with tea in the afternoon. It's simple, nothing too dramatic (except the little gingerbread men sprinkles) and its flavour packs a punch for those festive feels. It's the cake you need in the lead up to Christmas. I like my kitchen to be smelling of ginger and that sweet sticky treacle and this does just that. 

If you love ginger and loaf cakes....

Check out my other recipes for more inspiration!

Recipe

Prep: 15 minutes
Cook: 35-40 minutes
Serves: 8-10

Notes:

  • I prefer my glaze to be on the thicker side so that you can actually see it and get more flavour. If you want it thinner, just add some hot water a little at a time till the desired consistency. 
  • You can use any sprinkles you want to decorate, but I though the gingerbread men looked more festive. 

Ingredients

Cake
  • 275g self-raising flour
  • 150g dark brown sugar
  • 3g baking powder
  • 15g ground ginger
  • 2g mixed spice
  • Pinch of salt
  • 70ml soya milk
  • 60g treacle or molasses
  • 70g applesauce
  • 100ml butter, melted
Glaze
  • 150g icing sugar
  • 4tbsp orange juice
  • 2-3tbsp hot water if needed
  • Glacé ginger 
  • Sprinkles 

Method

  1. Preheat the oven to 170℃ and grease and line a 2lb loaf tin with baking paper.
  2. In a large bowl add the dry ingredients and mix well. In a separate bowl whisk together the treacle, melted butter and applesauce. 
  3. Then add this to the bowl of dry ingredients and whisk.  Add the soya milk gradually whilst mixing to slowly loosen the cake batter. 
  4. Spoon the cake batter into the prepared cake tin and bake for 35-40 minutes being careful not to burn the top. 
  5. Leave to cool completely in the tin before glazing. 
  6. To make the glaze, simply mix in the orange juice with the icing sugar. At first it will be quite clumpy but keep mixing. If the glaze needs to be loosened, add some hot water until the glaze is smooth and pourable but not too runny or transparent as it will slide right off the cake. 
  7. Coat the top of the cake with the glaze and sprinkle on some of the glacé ginger if using. Best stored in airtight container at room temperature for up to 3 days. Enjoy!

Christina 
xx


Share:

Sunday 21 November 2021

Vegan 'Kinder Bueno' Cookie Bars

Gooey cookie bars filled with a vegan, creamy hazelnut filled chocolate!

I have been waiting for a day that a vegan alternative to kinder bueno graces our shelves and could not wait to get my hands on the delicious chocolate bars by Love Raw. Their cream filled wafer bars are SO similar to kinder buenos, the filling is super creamy and tastes like hazelnut with the right amount of crispy wafer. I managed to find them in my nearest Asda, so hoping they will merge into other supermarkets so they are more accessible. they truly are a fantastic replica and I can't wait to se what other products Love Raw will present us. When I made this recipe, I wasn't sure what to put these chocolate bars with, and had the idea of a cookie but fancied something a little bigger - enter the cookie bar! Now by no means have I invented the cookie bars, but cookie dough meets hazelnut wafer chocolate is right up my street and if you follow the same path you'll love this recipe too. And now that I know about Love Raw chocolate bars, this isn't the last of the 'Kinder Bueno' category on my blog :)

If you love cookie bars and chocolate...

Check out my other recipes for more inspiration!

Recipe

Prep: 10 minutes
Cook: 18 minutes
Serves: 16 bars

NOTE: every ingredient I use is vegan so make sure you check your ingredients if you're following a Vegan lifestyle.

Ingredients

275g Plain flour
1 tsp Baking soda
1 tsp Salt
1 tbsp Cornflour
120g butter
50g Caster sugar
140g Light brown sugar
50g Applesauce
1 tsp Vanilla extract
250g Love Raw Bars chopped
100g Chocolate chips

Method

✿Preheat heat the oven to 180℃ and line a 21cm tray with baking paper.
✿In a standing mixer, beat together the butter and sugars until fluffy. Then add the vanilla and salt and mix.
✿Add the applesauce and cornflour and combine - the mixture will probably split but don't worry!
✿Add the flour and mix together into a cookie dough then remove from the machine. Use a wooden spoon to fold in the chocolate chips and the 3/4 of the chocolate bars.
✿Spoon into the prepared tray and top with the remaining chocolate bars pressing them on top of the cookie dough. 
✿Bake for 15-18 until golden brown and still gooey, don't over bake as the cookies will be hard, you want them to be soft and they will harden nicely as they cool down. 
✿Leave to cool before slicing into 16 bars. Best kept at room temperature in an airtight container up 1 week. Enjoy!

Christina 
xx
Share:

Tuesday 16 November 2021

Apple Banana Bread

This banana bread has lots of extra juiciness and sweetness from the delicious apples!

We are super lucky in the UK, that apples can be grown all year through which makes them a sustainable fruit to be eating. Depending on what apples you can get gives a different flavour - some are super sweet or juicier or even a little bitter. For this recipe I prefer to use Braeburn, Cox or Pink Lady apples as I like the balance of green and red on the skin :) Apples and bananas pair well together as they both have different textures and levels of sweetness which is great in an easy banana bread recipe. Grating the apple makes it easier to distribute that moisture and having some in cubes gives a little crunch. I recommend a spread of almond butter to balance out that sweetness!

If you love apples and bananas....

Check out my other recipes for ore inspiration!

Recipe

Prep: 15 minutes
Cook: 50 minutes
Serves: 8-10

NOTE: every ingredient I use is vegan so make sure you check your ingredients if you're following a Vegan lifestyle.

Ingredients

210g Plain flour
300g Bananas, very ripe
150g Light brown sugar
2 tsp Baking powder
1 tbsp Cinnamon
1 tsp Ginger
1 tsp Nutmeg
60g Butter, melted
1 Flax egg = 3 tbsp ground flaxseed + 6 tbsp water mixed together
2 Apples 


Method

✿Preheat the oven to 180℃ and grease and line a 2lb loaf tin with baking paper.
In a bowl, mash the bananas with a fork then mix with the flax egg, butter and brown sugar.
Stir in the flour and spices, then grate one of the apples and fold through the batter.
Spoon the batter into the prepared loaf tin spreading out evenly. Chop up the remaining apple and scatter on top of the batter -you may only need half of the other apple.
Place in the oven to bake for 25 minutes, then cover with foil and continue to bake another 25-30 minutes until a knife inserted comes out clean. 
Leave to cool in the loaf tin before removing and slicing. Best kept covered at room temperature up to 5 days. Enjoy!

Christina
xx


Share:

Sweet Potato Bread

Upgrade your morning toast with a slice of this beautiful sweet potato bread!

We've got banana bread, we've got pumpkin bread, but sweet potato bread is the new kid on the block! Adding fruits or vegetables to recipes like these add that divine moisture and gooey sort of texture which is why it's almost like a cake rather than a bread. This is another beautiful autumnal recipe that's perfect if you've got any leftover sweet potatoes to use up or you just fancy baking something a little different. I was blown away by the results of this bread, one of my work colleagues even said it was the best thing I have ever made - a bold statement but one I can get on board with, so I am sure you will love this bread too. I will say that I am not sure if the sweet potato can be substituted for another potato or starchy vegetable - they all have different water quantities so I would stick with the sweet potato to be on the safe side :) A slice of this toasted with a slathering of nut butter is a firm favourite of mine and it also works well with butter and cheese, random I know but try it!

If you love sweet potato and bread....

Check out my other recipes for more inspiration!

Recipe

Prep: 15 minutes
Cook: 50 minutes
Serves: 10 


Ingredients

  • 200g plain flour
  • 120ml soya milk + 1tbsp apple cider vinegar
  • 100g caster sugar
  • 60g light brown sugar
  • 80g butter, melted
  • 250g sweet potato puree - either boiled or steamed then mashed 
  • ½ tsp baking powder
  • ½ tsp baking soda
  • 1 tsp cinnamon
  • 1 tsp ginger
  • ½ tsp nutmeg
  • ¼ tsp ground cloves
  • Pinch of salt
  • 30g pumpkin seeds
  • 50g pecans, chopped

Method

  1. Preheat the oven to 170℃ and grease and line a 2lb loaf tin with baking paper. 
  2. In a jug, mix together the soya milk and apple cider vinegar then leave to the side for 5 minutes to create a 'buttermilk'. 
  3. In a large bowl, combine the flour, spices and salt. 
  4. In another bowl, whisk together the butter and both sugars. Then add the sweet potato puree and whisk. 
  5. Gradually add some of the flour mix and then the 'buttermilk' alternating between the two until you have a smooth batter. Try not to over mix the batter, once the ingredients are combined stop mixing. 
  6. Spoon the batter into the loaf tin and smooth out. Sprinkle on top the chopped pecans and pumpkin seeds then bake in the oven for 45-50 minutes until a knife inserted comes out clean. Half way through you may need to cover the bread with foil in case the top starts to burn. 
  7. Once baked, leave to cool in the tin before removing. Best kept in an airtight container up tp 5 days. Enjoy!

Christina 
xx


Share:
© Christina Cullen | All rights reserved.
Blog Layout Created by pipdig